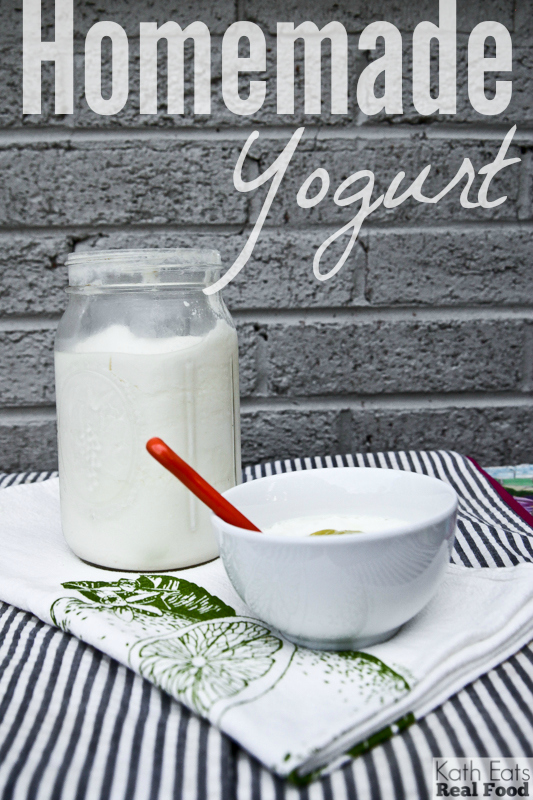
This post walks you through the steps to make yogurt at home from organic milk. The steps are simple and most of the time the process is hands off.
Why make yogurt at home?
Since milk is one of the original farm-to-table staples, making yogurt has been going on for ages. It’s one of my very favorite foods for breakfast, a lunch side or a snack because it has 8 grams of high-quality protein (in every 8-ounce glass), which fills me right up.
How to make yogurt at home
Although we’ve dabbled in homemade cheese, I’ve always been a little intimidated about making yogurt at home, but the process was actually quite simple. Just clean your props, warm milk, cool the milk, add yogurt starter, incubate so it will continue to thicken and chill. I did some research on the web to hone my process. There are a lot of opinions on yogurt making techniques. The only thing I think I’d change next time would be to use a smaller cooler. But I’ll get to that in a sec! My yogurt turned out great – here’s how I made it!
Steps to make yogurt
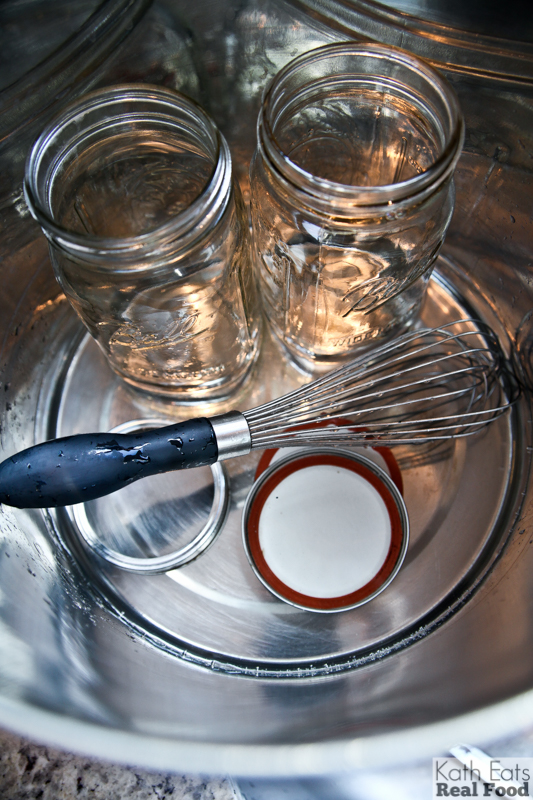
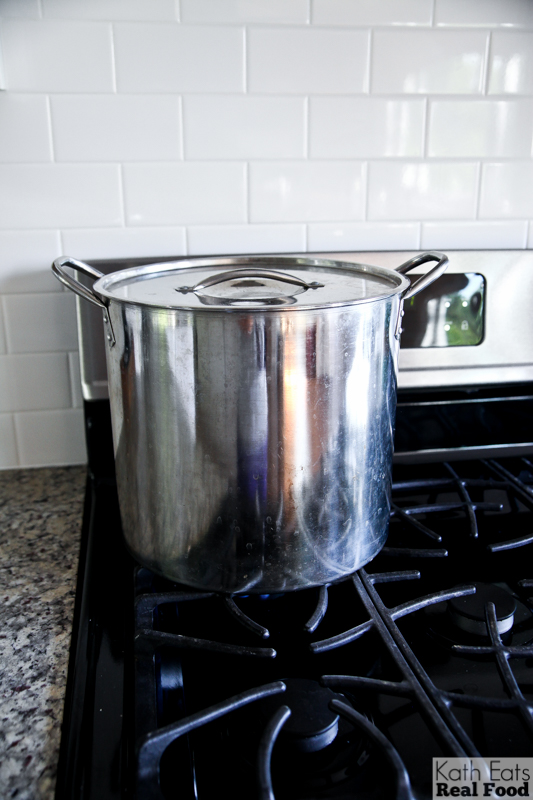
Step 1: Gather equipment.
I used our big stock pot to sanitize the equipment, our smaller pot for heating the milk, two quart mason jars for storage, and a thermometer and whisk.

Step 2: Sanitize equipment
You do this by adding a few inches of water to the pot and letting it slowly boil for about 10 minutes. I read you can also use the dishwasher for this, but since I didn’t know how long the cycle would take and mine was filled with oatmeal bowls, I figured simmering would be a little easier.
Step 3: Heat up milk.
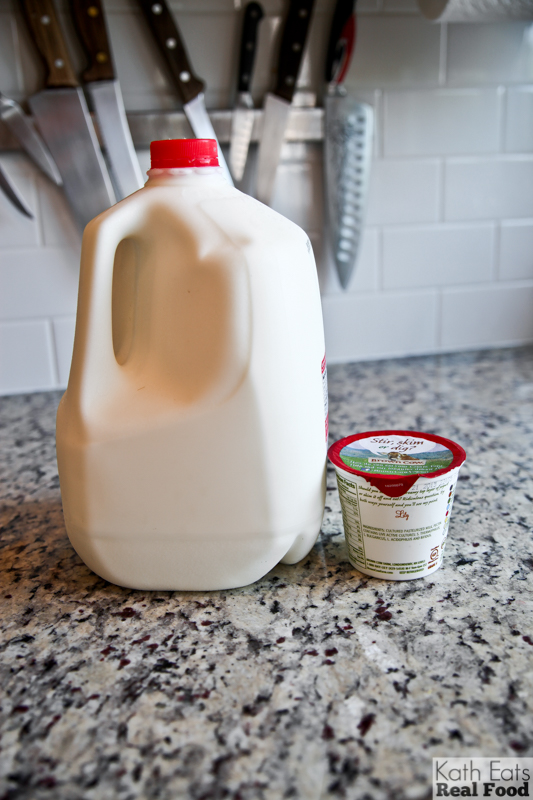
I used half a gallon of organic whole milk, as I read lots of articles that said lower fat milk like 2% or skim milk doesn’t work as well. Something to note about milk of different fat content is that no matter which kind you choose, you’re getting the same nine essential nutrients, including 8 grams of protein. I also made sure that the yogurt starter I used said it had LIVE active yogurt cultures!
Heat the milk to 185-190 degrees.

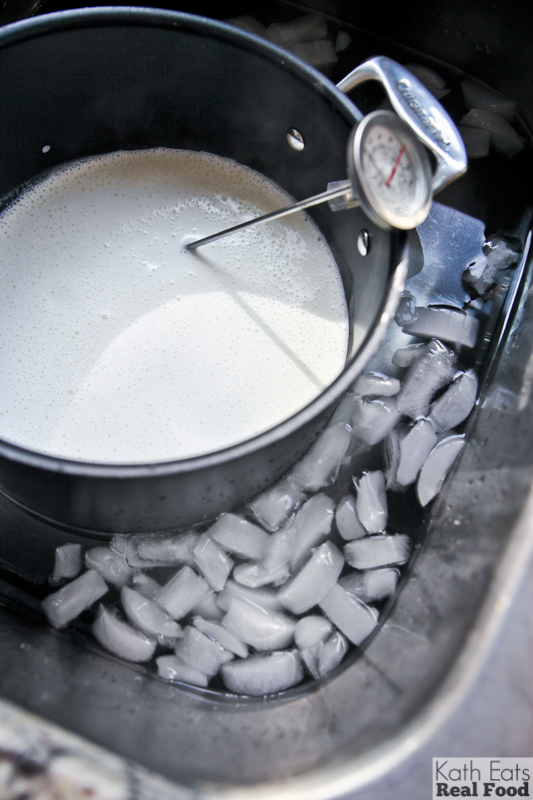
Step 4: Prepare ice bath
Make an ice bath in your sink to cool the milk back down to 120 degrees.
Step 5: While milk is cooling, get a few gallons of water heating on the stove.
You’ll use this to heat your incubator. You want it to be about 110 degrees inside the cooler, so I used water that was about 150 degrees to account for the cooler temp of the cooler when it started.
Step 6: Add your starter – 3 ounces of yogurt per half gallon of milk.
This can be previously made homemade yogurt or a commercial one, but as I said above, make sure it has live active cultures on the label. I’ve also read that Greek yogurt isn’t the best, so get regular plain whole milk yogurt.
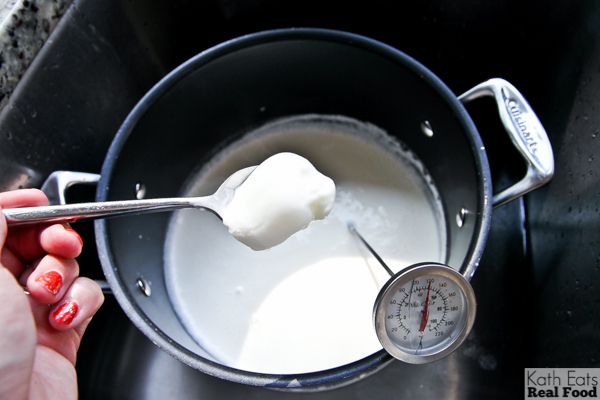
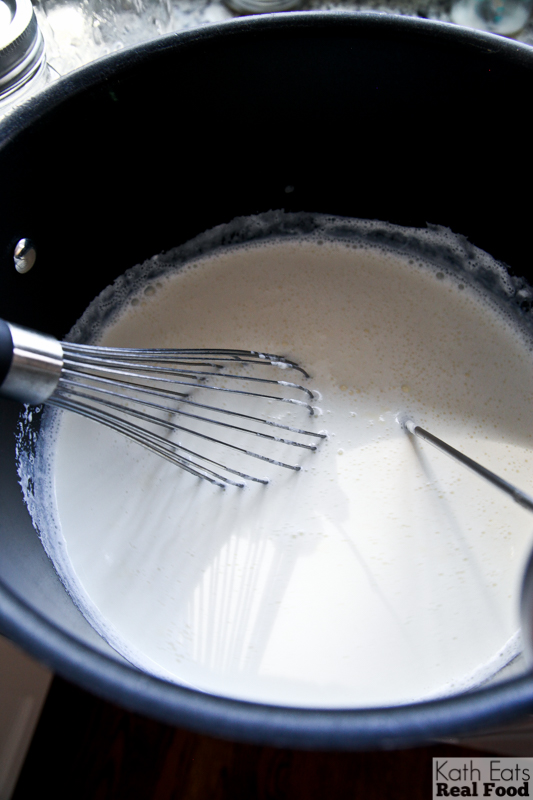
Whisk it in until it’s smooth.
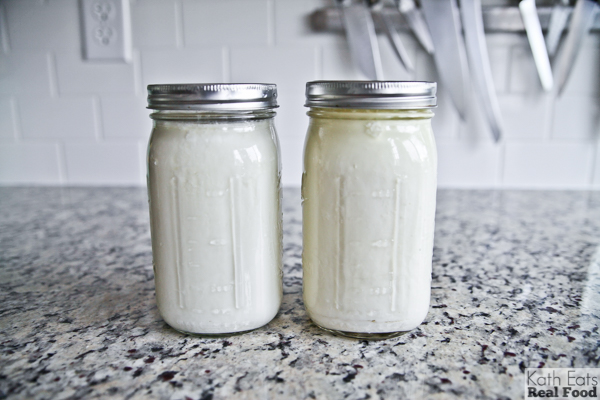
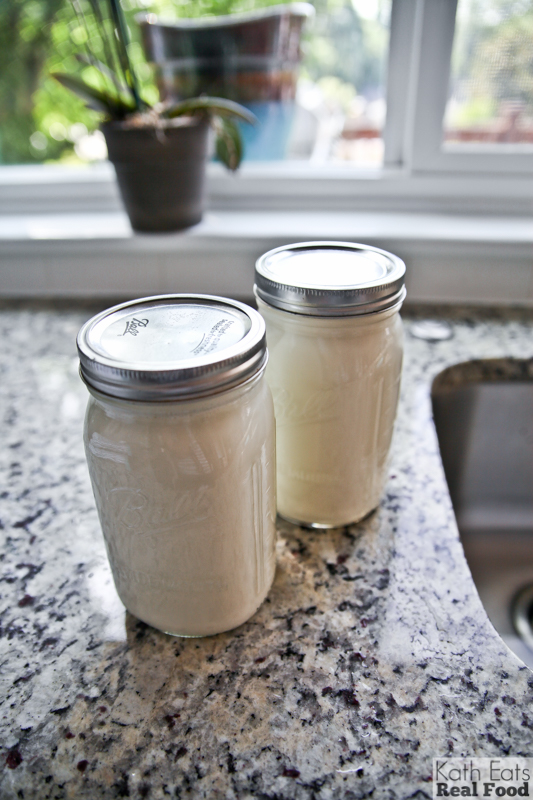
Step 7: Pour milk into your clean quart jars.
Some sites recommended funnels, but mine poured nicely right from the pot into the wide mouth jars.
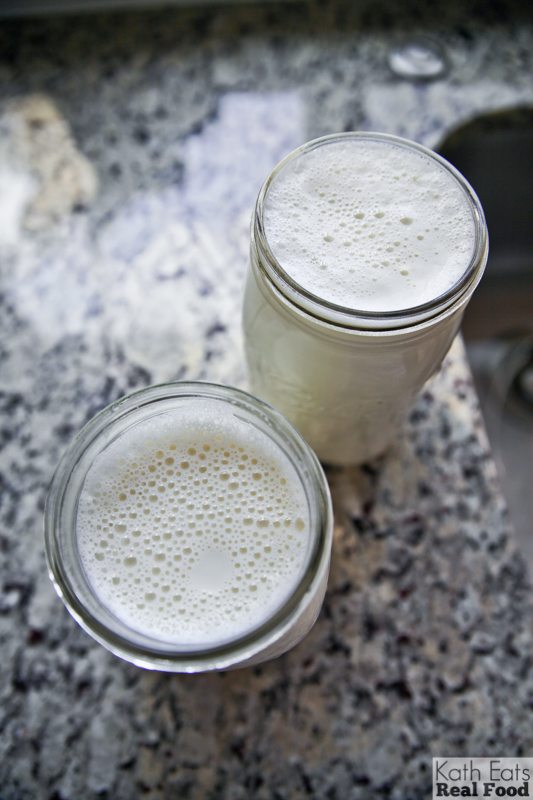
and cap with lids
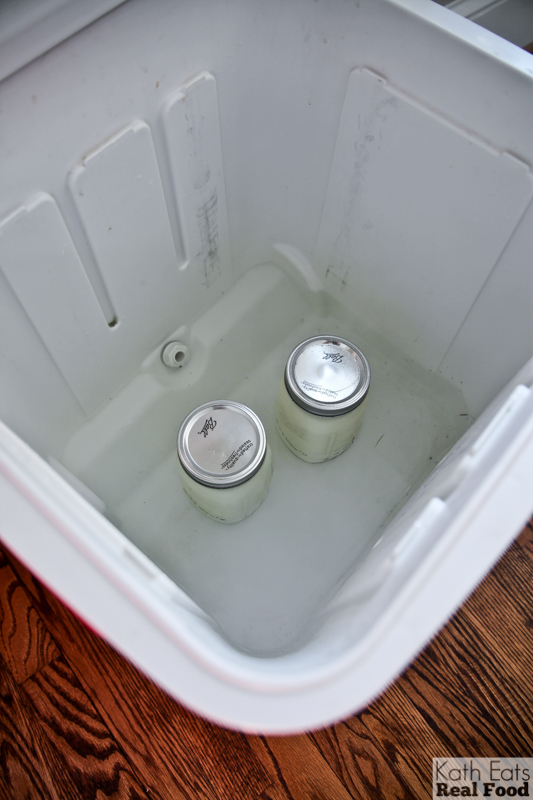
Step 8: Pour your hot (but not boiling!) stove water into the cooler and place your jars in to incubate.
Next time I will try to use a smaller cooler – mine was clearly too big! And don’t look at the dirt – I knew no food would be touching the inside so I didn’t bother to sanitize.
Step 9: Allow to incubate for 4-6 hours.
Types of yogurt incubators
I read lots of different opinions on incubation so I was most worried about this step. People have used a heating pad, the oven, the microwave – all kinds of incubators. Really you just need something that will hold the yogurt at 110 degrees for an extended period of time. The Instant pot work too!
>>> How to make instant pot yogurt
How long should you incubate yogurt?
And that time varies too – some said incubate for as little as 3 hours and others as long as 10 to 12 hours and overnight. I checked mine at 3.5 and 5 hours. When I checked the air temp after about 3.5 hours, it was in the 90s and my yogurt was still a little runny. I think this was because my cooler was too big! So I added some more hot water at this point and gave it another 1.5 hours. Then I had yogurt! I’m not sure if it was the temp change or the additional time, but I think what’s important to note that is that this process isn’t black and white – it seems to work in many different ways and you can adjust depending on your equipment and taste preferences.
Step 10: Chill yogurt for a few hours
And then crack open and see if it worked!
How did it taste?!
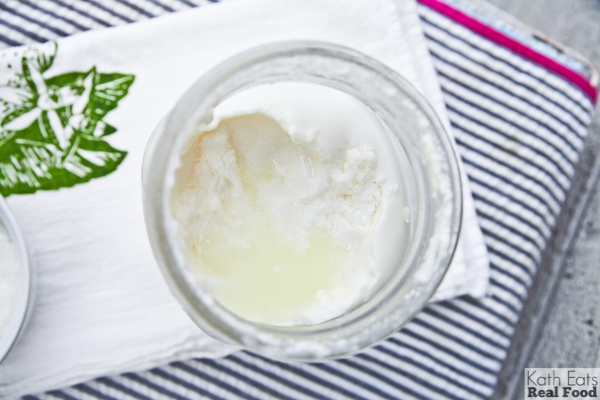
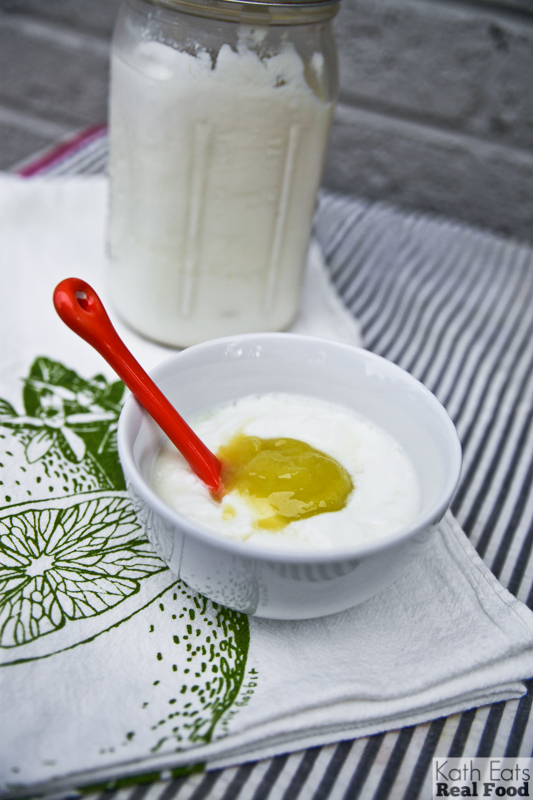
Mine turned out totally delicious – so rich and almost fluffy! I LOVE plain yogurt so this was a total win. There was some whey that I poured off the top (sorry, I can’t stomach saving that for a smoothie liquid!) but once that was poured off I had nice, thick yogurt.
Served with some Key Lime Curd on top!
How did the process go?
The whole process was much easier than I expected, and you could totally do this too! The hands-on time doesn’t take that long, and the incubation doesn’t need babysitting. That said, I’m not sure I’m going to be making yogurt every week, but I would like to try it again. I can see how if you wanted to make this a regular process an inexpensive yogurt maker like this one would be worth buying. That would save a few steps and streamline the process even more. I’m so glad I tried this though! Now I know how to do it, and I’m sure next time will be easier.
What flavors of homemade yogurt could you make?
Since this was my first time, I didn’t want to add any variables, but you could go crazy with flavor options added in the cooling stage! My friend Faith once made chai yogurt that was delicious. The beauty of doing it yourself is that you can get high-quality yogurt customized to your taste, and since it’s made with real milk, you know it’s a wholesome and nutritious choice as well. Real food at its finest : )
>>> Some tips on making homemade flavored yogurt
How To Store Homemade Yogurt
You’ll definitely want to use clean, air-tight containers (glass is best, but plastic works too). I like a wide-mouth mason jar so I can more easily scoop the yogurt out. You could also use store bought yogurt containers that have been sanitized for single servings or small bowls tightly wrapped. Make sure the lids fit snugly. Store in the refrigerator for 2-3 weeks at most.

Homemade Yogurt
Ingredients
- Half a gallon of whole milk
- 3 ounces of whole milk yogurt with active cultures
Instructions
- Gather two big pots, 2 quart jars with lids, a thermometer, a whisk and a small cooler.
- Place your jars, whisk and lids in a pot and fill with a few inches of water. Cover and heat to boiling for about 10 minutes.
- Pour milk into a stock pot and heat to 185 to 190 degrees.
- Fill a sink with ice water and place pot in ice bath. Cool milk to 120 degrees.
- Meanwhile, heat another pot of water above 110 degrees. This will go in your cooler.
- Whisk in 3 ounces of yogurt starter.
- Pour the milk into jars and add lids. Place jars in cooler full of heated water.
- Incubate for 4-6 hours, until the liquid milk in your jars has turned to yogurt when you tip them sideways. Ensure the temp stays around 110 degrees and add more hot water if necessary.
- After incubation, put jars in the fridge where yogurt will continue to firm up.
- Enjoy!
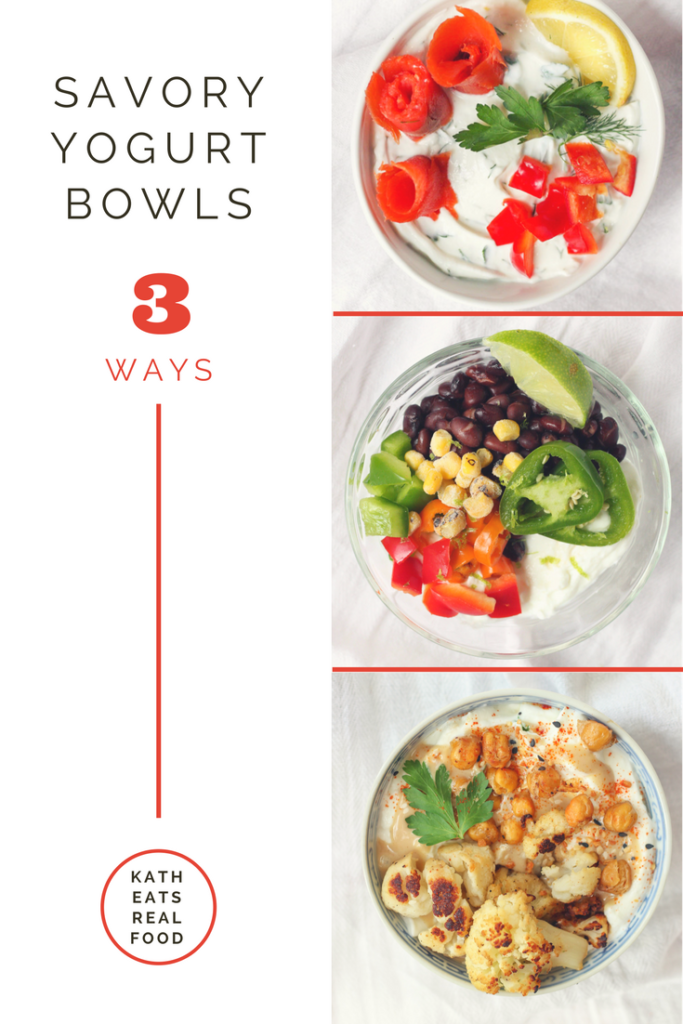
Ideas for using your homemade yogurt:
This post was sponsored by The National Milk Life Campaign

DHA says
Love this post! Very interesting!
mallika says
this is an interesting way to make yogurt – thanks for sharing. back in india, my mom made yogurt at home every single day – quite frankly, all she did was add some yogurt culture to lukewarm milk – and keep it in a warm area in the kitchen – best yogurt ever. I think it might have something to do with the yogurt culture.
cara zimmer says
Looks delicious! I like making mine in the crockpot, so easy!
http://homespunkitchen.blogspot.com/2012/01/crockpot-yogurt.html
KathEats says
Cool!!
Kelly says
Me too. Crockpot is so easy!
Amanda @ Slimplify Life says
I love your pictures!!!! I wish I could take a bite of this through my computer screen 🙂
Alison @ Daily Moves and Grooves says
This is so cool! I might try it one day!
Candy says
much easier in a crockpot – why complicate it? uses one pot. Greek yogurt works fine.
KathEats says
I would worry about contamination and storage a bit – how does one sterilize a crockpot? But I’m sure it can be done!
Stacey says
You just wash the crock in hot water. You don’t need to sterilize the warming part, since that’s not touching the food.
Candy says
It’s not necessary to be sterile. Hot water and soap do wonders. Our society is too obsessed with “sterile” and it hasn’t done us a darn bit of good.
Elizabeth Beil says
I have a free weekend and I am totally going to try this! It really does seem “easy.” I love yogurt and if I can say I made it, I think I would love it even more 🙂
Lisa says
I incubate my yogurt in a the jars in the oven (usually wrapped in a towel in a large pot) with the light on. Let it sit overnight and it is amazing. I strain off the whey too, can’t quite handle it!
Marjorie Scheib says
I love to make my own yogurt. I also add about 1/4 of dried milk to boost up the texture (per Alton Brown method) and I strain half of my batches through cheese cloth for a thicker Greek style version. Great post.
Sagan says
Thanks for this tutorial – it looks so tasty! I’ve made my own butter before but haven’t gotten around to trying my hand at homemade yogurt… this might have to be my next cooking adventure 😉
[email protected] says
That looks great! I will have to try it!
mollie says
love homemade yogurt. i know it’s not for everyone – but i actually use jamie oliver’s recipe and let it incubate on the counter overnight. i was a little nervous about getting sick but so far, so good! http://greek.food.com/recipe/jamie-olivers-homemade-yogurt-427235
Linda @ The Fitty says
It seems like a daunting task to make your own cheese! Maybe one day when I’m retired and full of time to myself.
Bridget says
I’ve been making yogurt in a crockpot for years (1 gallon of milk on low for four hours, turn it off and let it cool for four more hours, add yogurt culture, let sit out overnight for 12-24 hours) and I’ve never had an issue with contamination or mold. Sure, once I put it into the fridge, if it’s been a month, there might be something furry in it, but that certainly happens with regular store-bought yogurt as well.
Marissa says
This is way complicated! I come from a Middle Eastern family that has made yogurt for generations, and I’ve made it hundreds of times using the following method. We never sterilize the equipment; we simply boil the gallon of milk for 30 minutes (this gives a thicker end product), let it cool on the stove to 115 degrees, strain into bowls, mix in 1-2 cups of room temperature yogurt, wrap the bowls with towels, and place them in the oven or counter overnight. There is no need to keep the yogurt at 110 degrees externally; it produces heat as it cultures so you just need to trap it inside with the towels. For “Greek” yogurt, strain the yogurt through cheesecloth and use the whey in recipes to replace buttermilk.
Anjar Visla says
I lvoe yogurt but make a soy yogurt. I don’t do dairy becuase I’m vegan. If you have to do dairy why wouldn’t you get your milk from a local farm to cut down on transportation of the milk and support someone local? They are also kinder to the animals hopefully.
Christine says
We make yogurt in a similar way, and add real vanilla seeds (scraped out of a bean) to the mixture. No sugar or vanilla extract — just real seeds. It’s soooo good.
Amanda says
Question- how would you make your own yogurt from scratch, like, without using previously made yogurt?
Karen B. says
You can also use a probiotics capsule if you want more strains or don’t want to buy yogurt to start. Just twist the capsule open and add it to your milk or cream instead of a yogurt starter. It works great.
Erin @ Her Heartland Soul says
Yum! I love yogurt and this is totally something I would try once!
Dani @ DaniCaliforniaCooks says
I’ve never tried making yogurt! I think I’ll continue buying it in the store, but I would like to check that off that I’ve tried to make it one day.
Diana says
I agree with the crockpot gals. Super easy. I add a little powdered milk, too. It’s nice because you don’t have to worry about temperatures.
Liliann says
I don’t want You to think that I am just spamming, but You really inspired me and I created a blog. If You could find a minute, that would be a big privilege for me, if You just come and see. Thank You. http://lilianndehn.blogspot.com/
KathEats says
Congrats on the new blog!
Cassie says
OMG OMG OMG! This is the best recipe and DIY!
Melissa says
We make yogurt weekly with 2% Lactose Free milk (hubby is lactose intolerant). We did go with a yogurt maker (http://www.amazon.com/Euro-Cuisine-YM260-Yogurt-2-Quart/dp/B002KBFO6C/ref=sr_1_7?s=home-garden&ie=UTF8&qid=1435580747&sr=1-7&keywords=yogurt+maker), and it is just one big tub rather than small jars. Takes the guesswork out of the incubation (we had some hits and misses early on). We do use Stop&Shop plain greek yogurt for our starter and have had good luck.
Ulya says
Your yogurt looks great! It’s so much better to make your own yogurt! So much healthier than the store-bought ones.
I’m from Turkey, and we eat yogurt all the time (actually, yogurt comes from the Turkish work “yo?urt”). You don’t really need to sanitize everything or even measure the temp. You just boil the milk about 20 mins to get it thick. Then you pour the milk into containers (glass or clay works the best. I usually use clay pots). After that, you wait for some time until the milk gets warm enough so that you can hold your finger in for 5 seconds without burning. It should be not warmer and not cooler than this (if it is warmer, than the yogurt will be sour). After that, you whisk aside the starter yogurt with a tablespoon of the milk and add this starter (just pour, don’t whisk) to your milk in containers.
After that, don’t worry about the incubation. Just cover the yogurt containers with a blanket (this is literally what we do) or your cosy knit jumper, or anything that will keep them warm. Wait for 5-6 hours. Then transfer them to the refrigerator. Don’t touch them for at least 6 hours until they get thicker.