I like to dabble in cheesemaking! Here’s our version of homemade mozzarella, which is delicious and easy to make at home!
Homemade Mozzarella
Just about every homebrew shop carries the ingredients and equipment to make cheese – besides the fact that it’s easy to get into once you’re a brewer, there’s certainly something in the two hobbies that excites the same type of people. Cheese making, just like baking and brewing, is a fine balance between art and science.
In all three you can meticulously plan out your ingredients to the gram, diligently sanitize your equipment, carefully monitor temperature, but there’s something wild and unknown about adding yeast and other fermentative microorganisms to food. I like to think that if you give your yeast the respect it deserves, it will reward you with a high quality product.
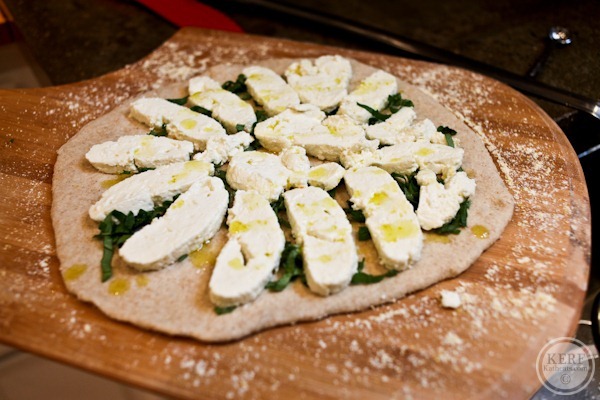
Fresh mozzarella is about as easy and quick as it comes if you want to make cheese (the only things easier being yogurt and soft, spreadable cheeses like goat cheese). All the methods we used are derived from Ricki Carroll and the New England Cheesemaking Supply Company. I also used the Pioneer Woman’s mozzarella recipe for some good guidance.

Homemade Mozzarella Ingredients
The ingredients are simple: a gallon of whole milk, citric acid, and rennet. The last two can easily be purchased online or probably at your local homebrew shop.
How to make homemade mozzarella cheese
The process is also pretty simple: we use the citric acid to curdle the milk and the rennet to coagulate it. Then we use heat to tighten the proteins, which wrings out a lot of the moisture. When it gets hot enough, it becomes very stretchy and pliable, and then it gets kneaded into the classic shiny mozzarella nuggets.
Step 1: Dissolve the citric acid in water
Start by dissolving 1.5 teaspoons of the citric acid in .25 cup of water. Stir to dissolve and give it a few minutes if needed.

Step 2: Heat the milk
In the meantime you can pour your milk into a non-reactive pot (anything but aluminum the websites say). We used Whole Foods’ 365 brand, organic in this post but we found the Trickling Springs Creamery milk we usually buy for drinking made a better product in our second batch. Just make sure it is NOT “ultra pasteurized milk.” – the proteins are broken down too much to make good cheese. “Pasteurized” is okay.
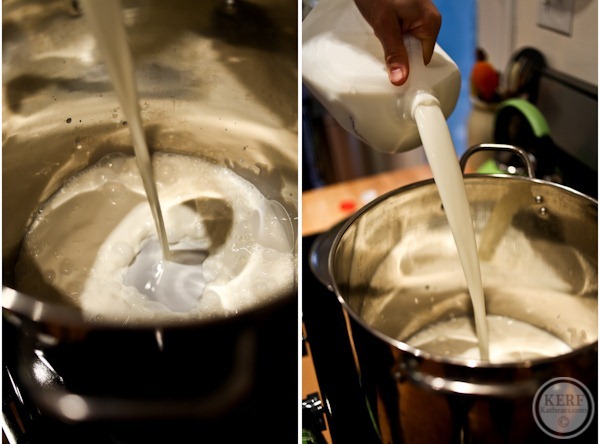
Bring the milk up to about 90 degrees measured with an instant read thermometer. Ours went a little over! But so long as it’s not above 105 degrees you’re okay. Stir occasionally to evenly distribute the heat.

Step 3: Dissolve the Rennet
While the milk is heating, add the rennet to water and dissolve. Use .25 teaspoon of rennet into 1 cup of water.
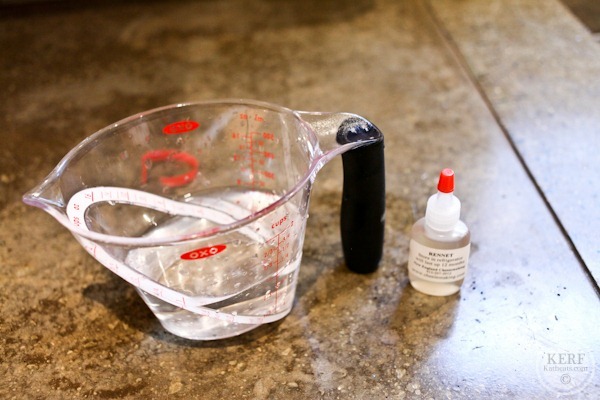
Step 4: Turn off heat and pour rennet mixture into milk
Once you hit the target temp, turn off the heat, pour in the rennet mixture, and stir for no more than 30 seconds to evenly distribute. Then stir in the opposite direction so that the milk is still. It’s important that the milk isn’t moving around too much so that it can coagulate properly.
Step 5: Let sit for 5 minutes
Cover the pot with plastic wrap or a plate and let sit for 5 minutes.
When you come back you’ll be surprised to find that the milk will look like thick custard floating in water! Give it a small push with your finger to double check that it has lightly coagulated. It definitely won’t have much spring back, but it should feel like a thick film. If it doesn’t feel like this or you’re not sure, it’s fine to give it an extra 5-15 minutes just to make sure. Total time can be about 20 minutes.
Step 6: Cut the curds
Now it’s time to cut the curds! In your bowl you have curds and whey. Use a knife or thin spatula that will reach the bottom of the liquid and cut into a 1 inch grid. This is to make it easier for the whey (the liquid) to drain off.

Step 7: Reheat to 105 degrees
Once the curd is cut, turn the heat on low to medium and gently stir as you bring it to 105 degrees. The curd cubes will break apart some and that’s okay.
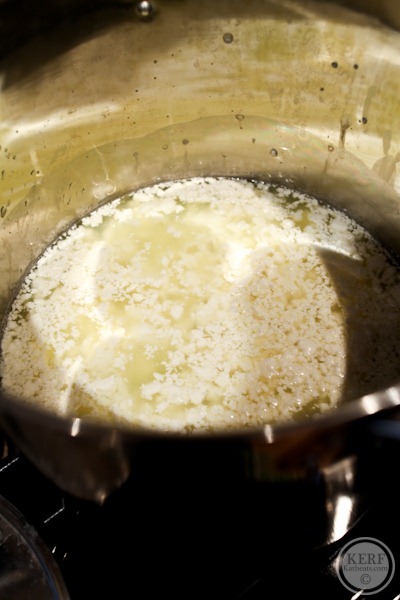
Step 8: Scoop out the curds
Now scoop out the curds with a slotted spoon or strainer.
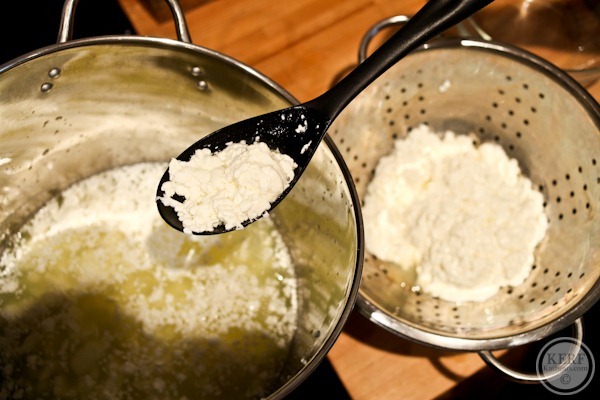

You’ll be amazed at how solid it already is!
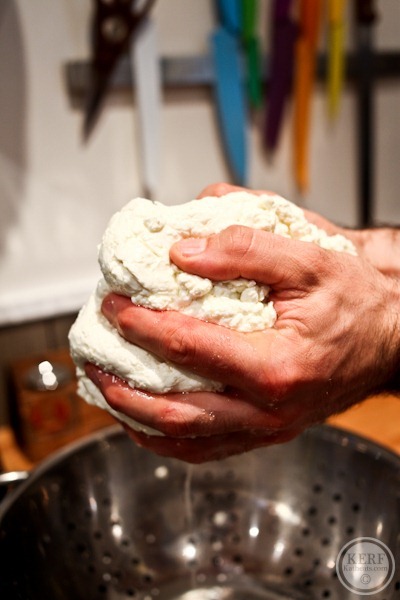
Step 9: Squeeze hot whey out of curd
Save the big pot of whey for now – you might use it later.
At this point the goal is to squeeze out a bunch of the hot whey and also heat the curd to a point that we can stretch and shape it. Put it in a microwave-safe bowl and cook on high for 1 minute.

Step 10: Squeeze and fold the curd
Take it out and give it a thorough squeeze. My preferred method of squeezing the whey out is not to remove the curd from the bowl but to press it against the side of the bowl. Tilt to the side to allow the whey to run out. Lightly stretch and fold the curd into itself. It’s not so much like kneading bread dough where you roughly and thoroughly tighten it – it’s more like lightly folding and squeezing/pressing. It will begin to tighten some and start to look a little shaggy.
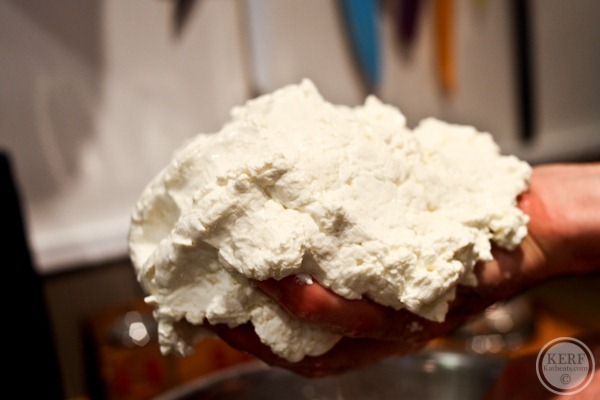
Continue with the microwaving (for 30 seconds at a time now) and then squeezing/folding process.

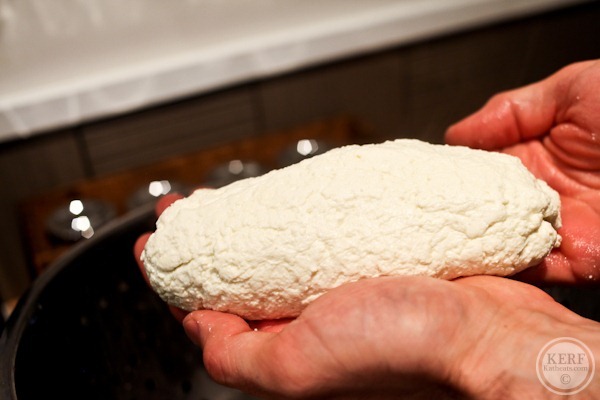
After three rounds, begin to try and pick it up and stretch it. If it tears easily, you need to keep microwaving and removing whey. Here’s a log of it that’s tearing:
Step 11: Add some salt
Eventually you’ll see that you can stretch it some without it tearing. This is the point to add about 1 teaspoon of granulated or kosher salt. Continue stretching and wrapping into itself until you have a smooth ball. If it cools down too much in your hands and begins to tear, heat it in the microwave a bit. Eventually you’ll get a sturdy, firm, smooth, and shiny ball on your hands:
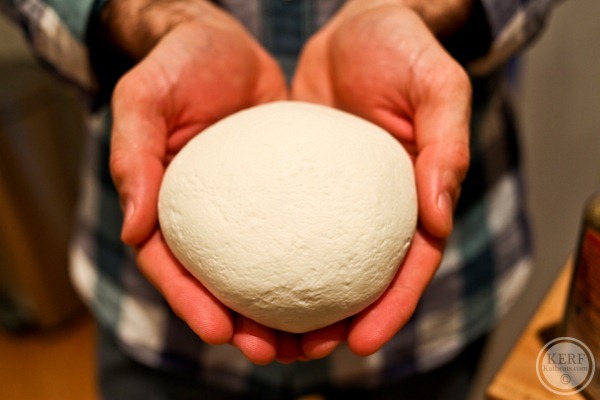
How much mozzarella will this recipe make?
This recipe will yield about a pound of final product. I find that half of this is good for one pizza, so consider splitting the batch in half at some point in the shaping process and making little tiny balls. Then add enough salt to some of the retained whey to make a briny solution and store in brine for about a week.
Recommended ways to enjoy fresh mozzarella:
Here are some popular ways to enjoy fresh mozzarella:
- Caprese Salad: This classic Italian dish combines fresh mozzarella with ripe tomatoes, fresh basil leaves, extra-virgin olive oil, balsamic vinegar, salt, and pepper. It’s a simple yet flavorful way to enjoy the creamy texture of fresh mozzarella.
- Pizza: Fresh mozzarella is a staple topping for traditional Neapolitan-style pizza. Add slices of fresh mozzarella to your pizza before baking for a gooey, cheesy topping that pairs well with tomato sauce and fresh basil.
- Bruschetta: Top toasted slices of baguette with fresh mozzarella, diced tomatoes, basil leaves, and a drizzle of balsamic glaze for a delicious appetizer or snack.
- Panini or Grilled Cheese: Add slices of fresh mozzarella to your favorite panini or grilled cheese sandwich for a creamy, melty texture.
- Caprese Skewers: Thread cherry tomatoes, fresh mozzarella balls, and fresh basil leaves onto skewers for a simple and elegant appetizer or party snack.
- Pasta Dishes: Toss fresh mozzarella into warm pasta dishes like spaghetti or penne with tomato sauce, pesto, or olive oil for a creamy and indulgent touch.
- Stuffed Peppers or Tomatoes: Slice fresh mozzarella and stuff it into hollowed-out bell peppers or tomatoes along with cooked grains, herbs, and seasonings before baking for a delicious vegetarian dish.
- Antipasto Platter: Serve fresh mozzarella alongside other Italian cured meats, olives, roasted vegetables, and crusty bread for a flavorful antipasto platter.
- Tomato and Mozzarella Sandwich: Layer slices of fresh mozzarella with ripe tomato slices, basil leaves, and a drizzle of balsamic glaze between two slices of crusty bread for a simple yet satisfying sandwich.
- Fruit and Cheese Plate: Pair slices of fresh mozzarella with seasonal fruits like ripe peaches, strawberries, or figs for a refreshing and balanced cheese plate.
At this point we’ve made mozzarella a couple times and like a lot of things in life, each time you do it you get a little better at it. The good news is that even if you produce a shaggy, ugly lump of curd, you’ve still made cheese! And it will taste great too! I highly recommend reading the FAQ on the cheesemaking.com website, and watching these videos to familiarize yourself. Happy cheesing!

Carly @ Snack Therapy says
This look delicious! Nothing beats fresh mozzarella. My boyfriend and I like to slice it up with super thin tomatoes and a drizzle of balsamic and sprinkles of basil. So tasty and fresh. I think I’d be a little intimidated to make my own though!
Laura @ Sprint 2 the Table says
There is nothing better than fresh mozzarella! A few restaurants here make their own in house, but I’ve been too intimidated to try myself… maybe I will now! What’s next? Burrata?
KathEats says
Looooove burrata! Matt mentioned trying this soon
Liz @ Tip Top Shape says
Really great and informative post!
Laura (Blogging Over Thyme) says
I made mozzarella while in culinary school and found the whole process really fascinating! Although, I think your process sounds more simple and straight-forward than what we might have done (that’s a good thing). We actually took the curds and poured a little bit of boiling, very hot water over them and that’s how we started the stretching–very interested in your microwaving method though!
Great and well-written post!
Matt says
Yeah, this is definitely the traditional method and I want to try this soon. I also want to try it with an acidic bacterial culture instead of using the citric acid!
Mrs. K says
Oh, good, I’m glad you mentioned this. I don’t have a microwave and wondered how I could still try cheesemaking!
Anne says
I was just coming here to ask if there was an alternative to the microwave! So, just boiling water over the curds? Same method otherwise?
the 3volution of j3nn says
I have a hard time cooking with fresh mozzarella; I steal too many bites from the recipe! This looks easy and delicious. Wish I could score some buffalo milk and try it with that.
Ana says
Thanks gor sharing your methodmfornthe mozzarella Kath!!
Cant wait to see the goat cheese post, that is the one cheese I want to try making the most!
I have made cheeses already and it is just as you said, the more you make, the better they turn out! And one of the best advices with cheese making is to not skimp on good quality milk, as the milk is definitely the most important thing!
Ana
Averie @ Averie Cooks says
This looks pretty amazing! Thanks for the tutorial and although I’ve made kombucha, kefir, bread dough and other ‘living’ foods with cultures or yeast, never cheese. But I’d love to try one day!
Katie @ Peace Love & Oats says
Oh my gosh, that’s so cool! I had no idea you could make your own cheese!
Grace @ Grace Dishes says
I adore your walk through! The mozzarella looks fabulous!
Tony @ Simple Awesome Cooking says
Wow, Kath, that is really awesome! Congrats on the outcome, I’m really impressed.
Shana says
I see what you did there with the “Take it a whey.” Good stuff!
Kelly K says
Very cool! Thank you for sharing. This makes something that I probably would have never tried on my own seem very doable!
gina (fitnessista) says
loved this post, even though the thought of making cheese has always been daunting for me!
heads up to vegetarian friends: they sell vegetarian rennet at many health food stores (derived from plants or fungus) in case you don’t want to use animal rennet.
Jessica says
What an interesting process and it looks delicious! Although being reminded what rennet is kind of makes me puke in my mouth 🙁
Cortney says
I know…it makes me sad to know how they harvest it. 🙁
Tine says
Waw amazing! Your own mozzarella. Nice!
Kristen @ Change of Pace says
It looks a little intimidating… but definitely worth trying!
Kavi says
I like how you described the process as a balance of art and science. As a scientist with a creative personality, I think those two go hand in hand, even though most people wouldn’t think so at first. Looks like there will be a lot of pizza & beer nights in your future… YUM!
Ashley says
Thanks for the tutorial, Matt, this was a very informative post! Might have to make some cheese this weekend. Approximately how long did the whole process take from start to finish?
Matt says
Ricki Carroll calls this “30 Minute Mozzarella” although your first time will probably take about an hour! I think we can get quicker with practice!
Sara @ fitcupcaker says
wow, looks awesome. I bet it tastes great!
Susan H. @ The Food Allergy Chronicles says
Wow…you make it look so easy! 🙂 Great post Matt! If only we did not have a dairy allergy in the family. 🙁
Polly says
I have been wanting to make mozzarella for a while! I bought the kit and haven’t tried it yet. My only holdup is that I don’t have a microwave, so I’m not sure how I could stretch the curd/remove the whey properly. Any ideas?
Matt says
I haven’t done this myself but the traditional method involves pouring 2-3 cups of boiling water over the curds to heat them, then pressing and stretching and repeating. Watch the videos at the end of the post and you’ll see. It will look intimidating but remember: at every stage of this process you have something that is edible. Even if you mess up you still have food!
J says
Yum! You’ve got a real talent for food writing, Matt. Can we get more posts like this in the future?
Vidya says
I think so too. Kath and Matt have totally different styles of writing yet complement each other perfectly.
Rachel says
Great post! I’ve been reading for years (never commenting though). I found the blog via the original oatmeal recipe which I loved because it was a useful and straightforward post. I’ve been whipping bananas into my oats ever since! I still read the blog because I like to hear how you and Matt are doing. In recent times, I’ve found the blog not as useful (although if I were a mother I would probably appreciate your feedback on products via babykerf). I’ve also read some of the negative stuff online and admire your efforts to adapt your blog in the face of mean criticism and your own changing life. I would love to see more posts like this cheese post because I found it inspiring, informative, and it would be a very good guide for me to make cheese myself. It also provided links to other good resources. It reminds me of the exact reason I started to read your blog (or more importantly, bookmarked it!!) Keep going!!
Jaleh says
Hi! This is awesome and I can’t wait to try it. I think I missed it in the instructions, but did you put the citric acid/water solution in the pot with the milk before heating the milk?
Thanks!
Matt says
Yep, we added the acid solution to the cold milk and then turned on the heat.
Katie @ Talk Less, Say More says
This is AWESOME! If I could eat cheese, I’d try it! 😉
Sarah (The Simple Dietitian) says
This is so great! You make it look so easy. 😉
Thanks for the great tutorial…I can’t wait to try it for myself! 😀
Nina @ Too Hottie For That Body says
Whoa… you guys are amazing! I was just proud of myself for choosing a Newman’s own frozen pizza vs. digiorno thick crust. I think I need to step up my game 😉 Maybe I’ll start with this method of cheese making… or maybe I’ll just buy some fresh mozzarella vs the cheese stick kind. (baby steps)
Jennifer N says
I also seemed to have missed the point when you add the citric acid. Maybe that got left out?
Matt says
Yep, add the acidic solution to the milk before/during heating.
Annette @FitnessPerks says
This looks seriously awesome! Nothing beats FRESH cheese. nada.
Lori says
Great post! I am liking the new direction of this blog. I don’t have a microwave- any recommendations instead on how to try this? Thanks!
Matt says
check out one of my comments above, and watch the video link at the bottom of the post!
Michaela says
well written, Matt! You should write posts like these more often, very informative + easy to understand!
I would have liked to see a picture of the baked pizza with the melted cheese, though.
S says
Ive read here for a while but never commented, and I have to say I LOVED this! As a fellow bread baker (by profession and hobby) and complete beginner in beer brewing, I would love to see more posts like this.
My favorite thing about this site is how Kath writes everything so straightforward and simple. Matt, you explained this the same way. Thanks for posting this!
Laura says
Is this more cost efficient than buying yourself or is it about the same to buy in store?
Matt says
Well, a gallon of best-quality whole milk cost me about $8 and we made about 1 pound of mozzarella. Minus the enjoyment factor!
Heatheranne says
All I can say is *yummmmmmmmmy*
Diana @ Eating Made Easy says
Very impressive Matt! It’s always fun to experiment in the kitchen. Well done.
Jen says
Yummo! Did you decide to make it homemade just for fun and interest? Curious if it’s cheaper than buying it from the store or healthier…
Kathy says
Poor little calves! I don’t want to know how they get that rennet out. Perhaps there’s a substitute? Will you try it and let us know? 🙂
Matt says
There’s vegetable-derived rennet available. Something in your comment suggests you already know this? How bout trying and letting us know?
Anne says
Actually, I’m curious about the difference between using animal and vegetable rennet, too. Does it yield roughly the same product? Matt, your reply here seems unduly harsh.
Matt says
No offense intended, I apologize! I’ve only used one kind of rennet so far and I’m pretty sure it’s animal sourced. It came with the goat cheese kit we bought. As far as I know they should work the same – after all, rennet is just a solution of enzymes. But there might be some difference, I don’t know.
The crazy thing is you need so little rennet to make cheese that I’m reluctant to buy anymore until I use up what I have. Some recipes for cheese call for 1/5 of a drop of rennet… that’s right, one fifth! So maybe a year down the road I’ll buy some veggie rennet!
Maeve Swiftly says
There are several kinds of vegetable rennet. The best is Chymosin rennet available from online cheese stores. The other is junket rennet which is notoriously weak. I use Chymosin. It works very well, although I have never used animal rennet to compare it to.
Lori says
I’ve heard you can use vinegar instead. Anyone know if this is true?
Lisa @bitesforbabies says
Brilliant!! I’ve been meaning to try making my own but I’m too busy trying out a million other recipes! Maybe it’s also because I know that my husband (born and raised in Italy!) would most likely not approve..and all my effort would be in vain!! Lol!
seana says
Homemade moz sounds good. This is my fav recipe for homemade ricotta. No special ingredients unless you count cheesecloth special : Only three ingredients. This is so delish just on a spoon while warm (I like a little salt and pepper on it). Especially good using with a simple veggie recipe (like zuchinni boats). It’s from Cooking Light and I’ve been making it for years. http://www.myrecipes.com/recipe/homemade-ricotta-cheese-10000001041858/
I’ve been wanting to try homemade moz but have yet to order the stuff online. No specialty stores locally. Enjoy your weekend!
Tami@nutmegnotebook says
Well done you two! I don’t know if I will try this myself but it sure was interesting.
Alan says
Thanks for such a wonderful “how-to” for one of the best things in life!! Love the recipes overall, love the baby pictures, the sunni-ness that you bring to the blogosphere.
Now, the big question is: When do we all crash the party and have all these great meals?!?! 🙂
Michele Sparrow says
Great post with wonderful details to go along with the photos. Thank you, Matt! I wanted to see if you might know if it would work to use goat’s milk instead of the cow’s milk. My boys have been raised on goat’s milk but I have never tried making mozzarella with it…only feta.
Matt says
It is definitely possible but I haven’t tried it yet – I wouldn’t be surprised if you have to do something like add more/less rennet. I’d like to try soon!
Chelsea @ One Healthy Munchkin says
I made yogurt in my food lab for school, but we never got to make cheese! I definitely want to give this a try when I have a spare afternoon one day (who knows when that will be though, haha).
Vidya says
I made cottage cheese if that counts ha ha. Would love to try this someday.
Caity says
Great post! I can’t wait to see the goat cheese post because I go through a tub a week on salads, omelettes, casseroles, etc.
Chelsea @ Designs on Dinner says
Strangely enough, during my first attempt at making cheese, mozzarella was the only one that did not turn out! The feta and cream cheese were wonderful. However, we didn’t use the microwave method like you did…I’m definitely going to try that next time.
Alyssa says
Although I am lactose intolerant, I WILL be making some of this cheese! So cool! Thanks for posting!
Maeve Swiftly says
I am so excited your first mozzarella turned out so well. I have been enjoying making cheese for about a year now. Ricki Carroll’s book has been an amazing resource. I am currently working on blogging my way through all her cheese recipes at http://maeveswiftly.wordpress.com/. Best of luck!
Christina @ The Beautiful Balance says
I have made mozzarella a few times and love it! I actually stretch mine in the warm water so I love seeing different ways to make it 🙂
Katie @ Real Food Katie's Way says
WOW. My world has just been rocked. Once again you’ve given me something to work towards!
PS I’ve been meaning to send you an email…Could Matt recommend any books on baking bread with whole grains? I love baking bread but I’m at the point where I want to learn and try new recipes! Being that Matt is somewhat BRILLIANT in that department I figured he’s the guy to go to for recommendations!
Matt says
Peter Reinhart’s Whole Grain Breads is an awesome reference for baking with whole grains. The hardest part about baking whole grain stuff is that it so often turns out like a dense brick (oh man I remember my first “loaf”). Reinhart has a great solution that involves hydrating practically all the flour… and some other great tips. It’s written for the home baker – check it out!
Lori says
Cool! I’ve been wanting to do this, and your post has inspired me to do so! I also want to make cream cheese since it’s near impossible to find any without stabilizers. And yogurt. Any experience making either of those?
Kristin says
Thank you for you informative post. We were able to successfully make mozzerella cheese today! Many thanks for your detailed instructions and pictures!