How to do your own DIY gel nails at home! Here are the supplies, colors, LED light and steps you need.
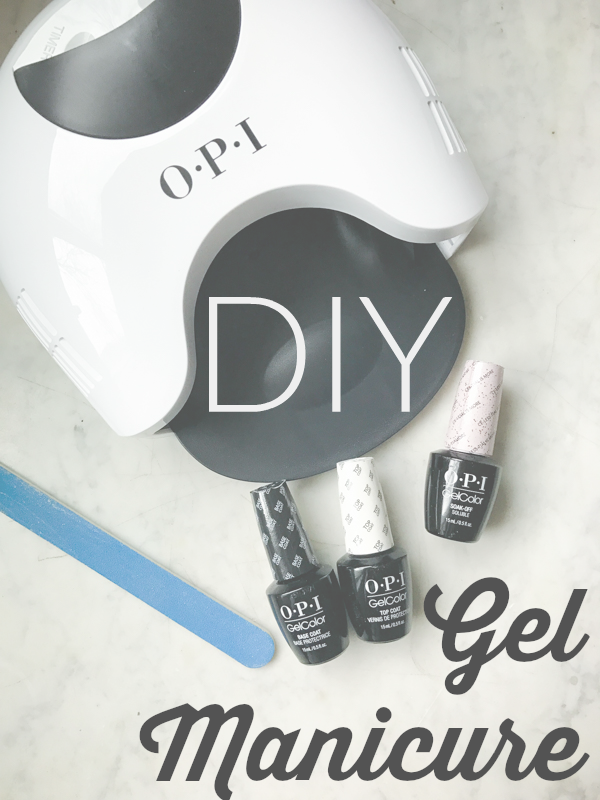
DIY gel nails at home using UV soak off gel and a LED light
DIY Gel Manicure At Home
I am not one of those gals who always has perfect nails. I tend to chip a classic manicure within 10 minutes of leaving the salon. And I am absolutely terrible at painting my nails at home. Once I took a long time to paint all 10 nails a dark shade but it looked so sloppy that I immediately took it all off and just went nail naked.
Earlier this year I had my first gel manicure. I could not believe for how long my nails looked great and that I could carry on with regular life without treating my nails like they were breakable glass.
But gel manis are expensive – $45 with tip at my favorite salon – and that’s not something I can justify spending on a regular basis long term.
A friend of mine had an at-home kit and did my nails for me once, and it worked quite well! Not quite as long-lasting as the salon, but pretty darn close. I researched what it would cost to buy my own, and I got everything for about $125. Therefore, DIY gel nails would pay for themselves in three manicures.
I bought the essentials on Amazon and have been SO happy with the results!! Here are all the details of my DIY gel nails.
Disclaimer: I am not a nail expert, and this is all just based on my experience doing this for a few months, so if I am inaccurate in any way, feel free to politely chime in to the comments : )
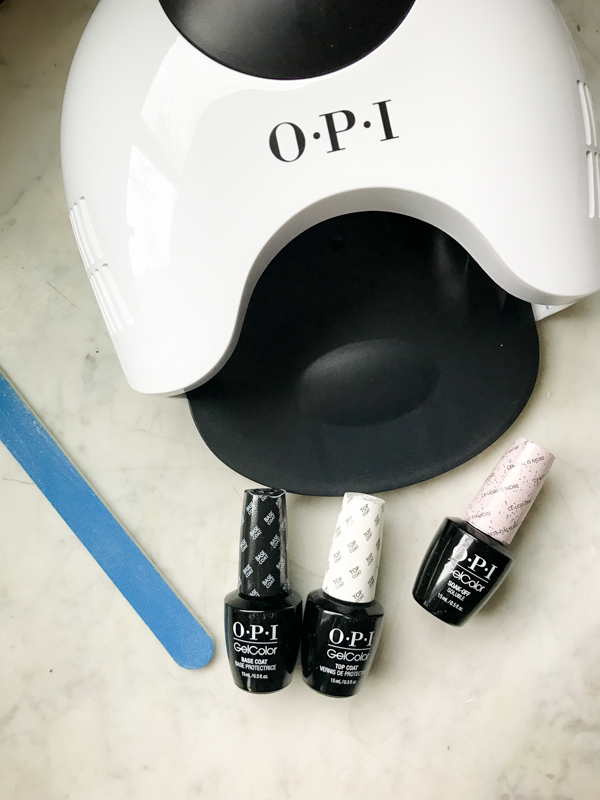
Where To Get DIY Gel Nails Polish and A LED Light
You only need a few things to get started. There is so much available on Amazon these days. I bought an OPI set that is no longer available, but check out brands like Beetles and AIMEILI.
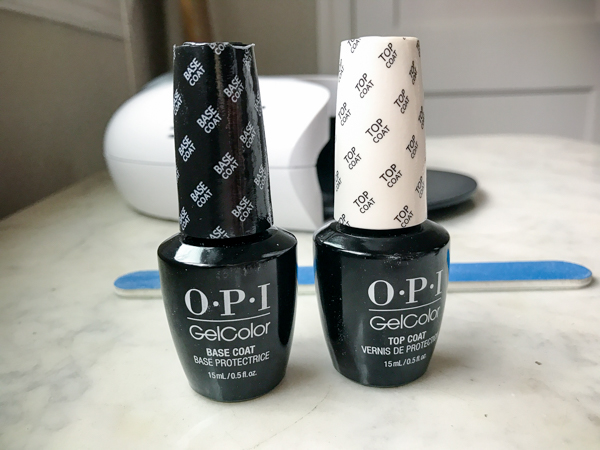
1. UV Soak Off Base Coat + Top Coat
It appears you can no longer buy OPI without being in the beauty industry, but there are lots of other options now! Look for anything that says “UV soak off nails” and “base coat and top coat.” Getting them in a set will save you some money. Two good options: Beetles (comes with a matte top coat) and AIMEILI.
2. Gel nail color.
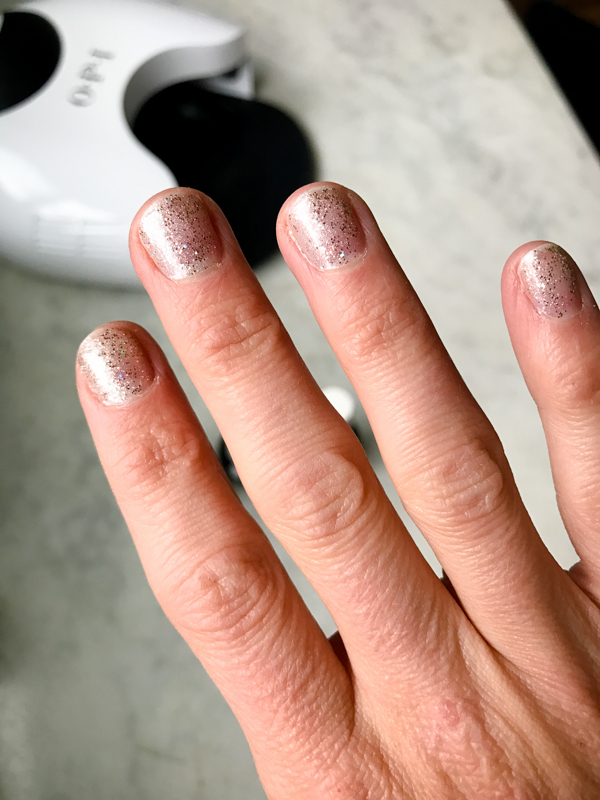
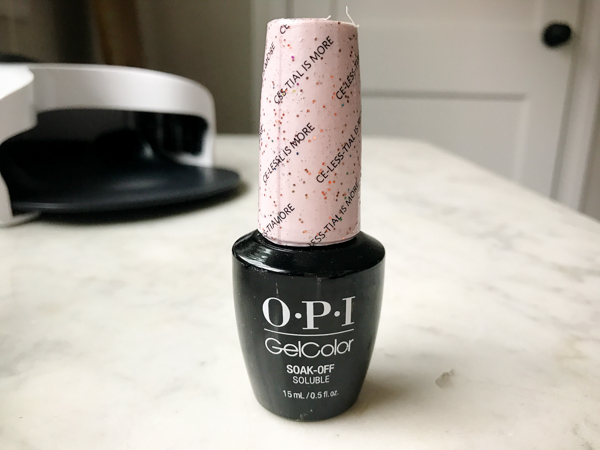
I have found that OPI gel color is pretty hard to locate. I checked at ULTA, Sephora, OPI’s site, and Sally Beauty and there seems to be a shortage of it. Amazon seemed to have the best selection! Ce-less-tial Is More is the color I fell in love with at my local salon. It has a hint of sparkle to it with a little rose gold underneath. I find the sparkle shades more forgiving for at-home manicures. This set has a mix of classic colors and a few sparkles. I also love muted shades, and this set of muted colors is beautiful! And here are some fun neon colors.
3. LED light.
There are lots of options on Amazon. Look for “gel nails LED light.”
I have read that LED is a lot better than UV. Some of you might be concerned about the LED effects on your hands over time, and to be honest I am a little bit too. I am taking a little risk though, based off of reading this article about a independent study that deemed UV lights safe enough for weekly manicures for 250 years. And that was using UV – I think LED is even lower risk. If they come out with another study that warms people not to use LED lights for nails at all I will immediately stop using it. I also use the minimum light for the curing process and the polish seems to dry just fine.
If you really don’t want to use a light, I have read that this product acts the same as light to cure, but I haven’t tried it.
How To Do DIY Gel Nails:
DIY Gel Nails
Equipment
- LED light
Ingredients
- Base coat + top coat set
- UV soak off gel nail color
- Rubbing alcohol
- Nail file
- LED light
Instructions
- Clean nails with rubbing alcohol to remove any lotions or soaps
- Use a file to buff nails a bit.
- Apply base coat and cure each hand under the LED for 30 seconds. I use the bare minimum of light to be on the safer side, and it seems to work fine.
- Apply color and cure for 30 seconds. If you're using a saturated color you probably want to do two coats, but to save polish, time, and money I just do one coat of my sparkly polish.
- Apply top coat and cure for 30 seconds.
I’d say the polish lasts a good week looking great, and then days 7-10 it starts to wear down, chip a little or peel up a little. By day 14 I definitely need to re-do my nails.
I think this photo is around day seven:

How To Remove Gel Nails At Home
So what about taking the DIY gel nails off? Doesn’t it ruin your nails? Not at all! I will say that manis done at the salon are harder to get off than mine (which is why they last a few extra days!) but taking the polish off is very easy. Here’s my little system.
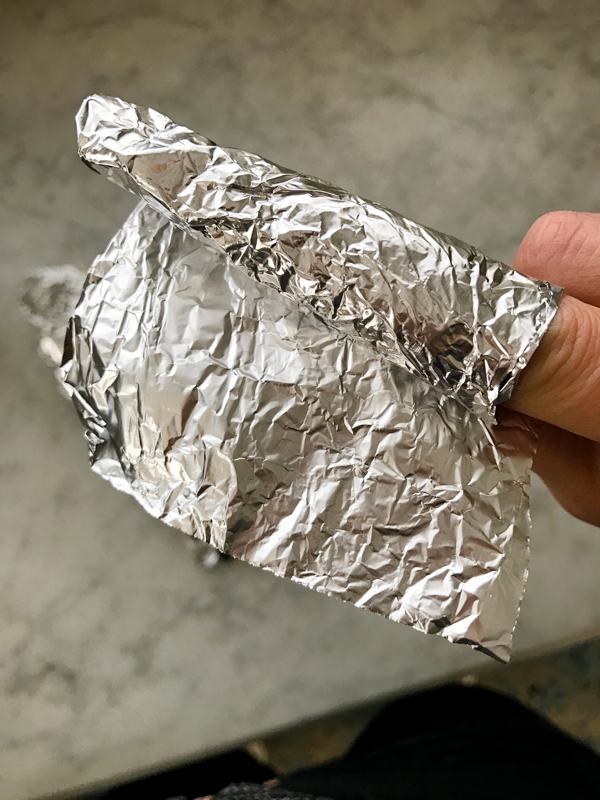
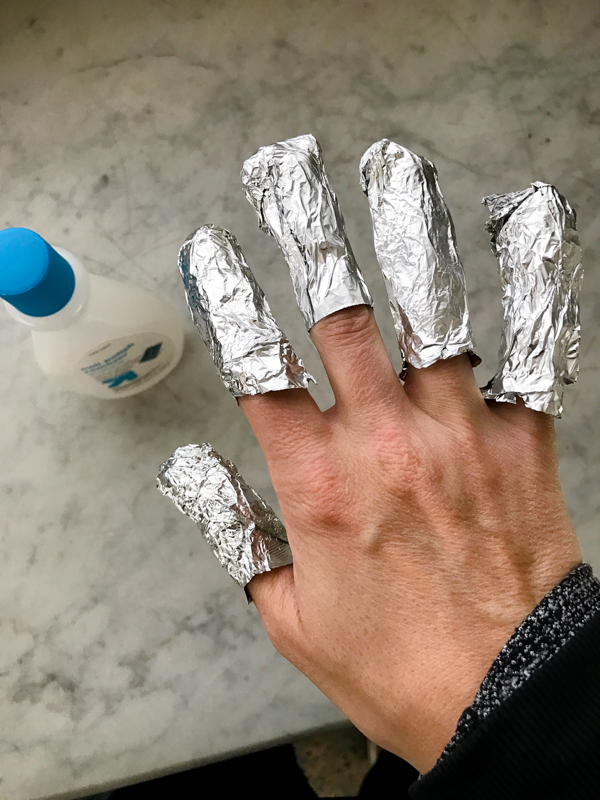
1. Cut five slips of tin foil.
(I re-use them for the second hand which saves time and foil!)
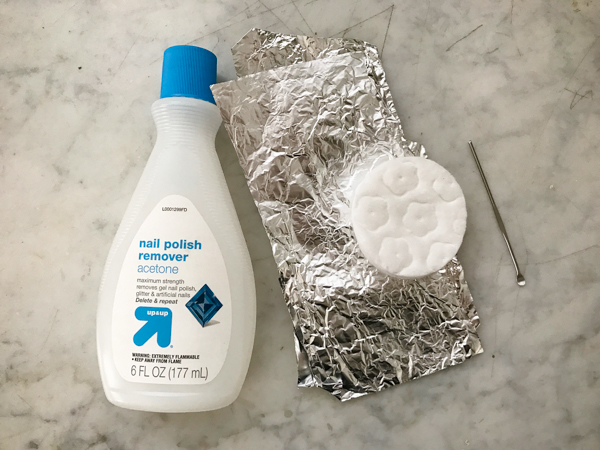
2. Soak a cotton round in some strong nail polish remover and then wrap it on the nail.
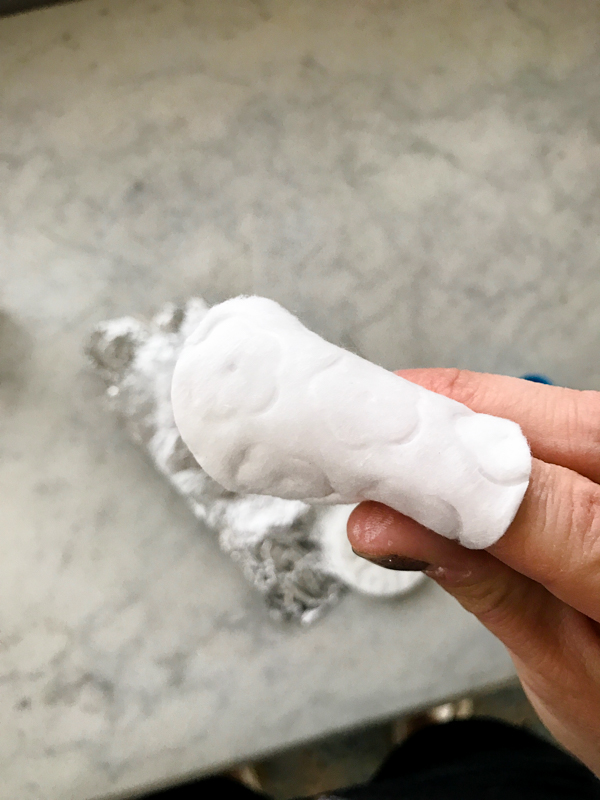
3. Wrap the foil around the cotton pad and squeeze to secure.
They do make re-usable nail covers for this, but I think this is just as easy.
4. Wait 5-10 minutes.
The longer you wait the easier it will be. And I do just one hand at a time so I can re-use the foil and have a free hand to do things with in the meantime.
5. At this point remove the foils by sliding them off (so you can re-use them on the other hand!) and use a cuticle pusher to gently scrape the gel off.
It should have curled up and sometimes the whole gel piece slides off with the foil! If it’s not coming off easily, give the nail a little more soaking.
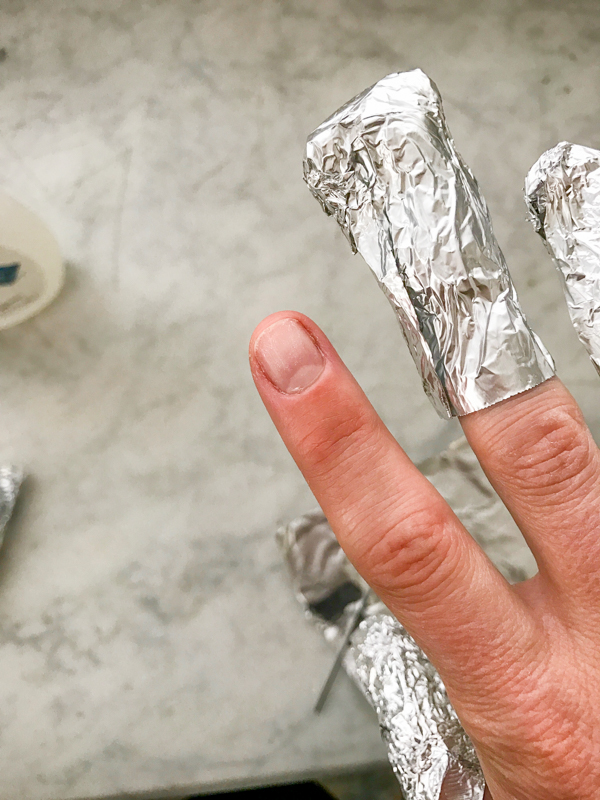
6. Repeat on hand two and your nails are naked again!
I usually wait a day or two to let my nails breathe before repainting the DIY gel nails again.
So there you have it! Sparkle, sparkle.
[email protected] says
I love gel manis and really never thought about doing it myself! This would save so much money and time getting them done.
Lauren says
I love gel manicures, so as an extra layer of protection I always apply sunscreen liberally on my hands to protect them from the light. It’s a good idea if you are doing gel frequently. They also make gloves to protect your hands from the lights too, or you can just cut fingers off a pair of old ones.
Nikki says
please please please put on sunblock before using the LED dryer! It’s a small amount of UV light, but if you’re using it frequently, why take the risk?
http://www.skincancer.org/media-and-press/press-release-2013/nail-lamps
KathEats says
I’m glad to read that they think it’s OK with sunscreen applied. A good practice whether you’re doing them at home or going to a salon. Salons should offer sunscreen as part of the manicure!
Astounded by Ignorance says
You can’t be serious. Using a curing lamp does NOT give you skin cancer. You are more likely to get skin cancer from the amount of sun you take in walking to your car from the nail salon than from the 5 minutes under the lamp. The UV and LED lights are not harmful. Good grief.
Alicia says
I have been using Sally Hansen Miracle Gel for over a year now. I paint my nails on Sunday night and they last for 5 days without chipping – perfect for the work week. No light – just a color and a top coat! I LOVE this product – It saves so much time and money, and I get a ton of compliments on my nails. Consider trying it if you want to avoid the light. It’s also way cheaper – the colors and top coat are like $8 each.
KathEats says
Cool! I will look for that. Anything that doesn’t chip is a win!
Erin says
I really love the Sally Hansen Miracle Gel, too!
Zoe says
A good tip is to take a cotton ball and unroll it gently so you have a long cotton strip. Then cut or tear it so you have nail sized pieces, and soak those in nail polish remover. That way you only need 2 cotton balls total to remove the polish
KathEats says
Great tip! I need some cotton balls when I run out of pads
Mom says
Love the sparkle!
CM says
Honestly, the ingredients in the polish and remover are probably more cause for concern than the light. Like the light, they’re most likely fine to use now and then, but definitely do your at-home manicures in a well-ventilated area. And ladies, if you’re pregnant or trying to become pregnant, it might be best to avoid all those chemicals entirely — not that I’m trying to tell you how to live your life! ;P
lisa says
What this post leaves out is the “toxic trio” found in nail polishes that are extremely harmful to health. There are alternatives to without the toxins, but not in gels. I don’t think your health is worth the risk.
http://articles.mercola.com/sites/articles/archive/2014/11/22/toxic-trio-nail-polish.aspx
Sam @ Hygge Wellness says
Thanks for sharing! This looks super easy to do. I’ve been trying to do more manicures at home, too since I just recently leave my job to start my own business. Every penny counts! : )
http://hyggewellness.com/blog
Agnese says
I have been doing my own mani for almost three years now, and I absolutely love it. It’s so much cheaper and in the last year or so there have been so many more companies producing this kind of products and in a lot more colors.
Agnese | Agnese’s Coiffeuse
Bites for Foodies says
Am I the only person who hasn’t gotten gel nails yet? lol! This looks easy enough for me to handle…and I need to do something about my nail situation 😉
OKC Electrician says
I have always been too scared to try this brand! I always get the Sally brand. I will have to give this a try though!
Kay says
The main reason I don’t use gel manis, is that my nails grow so fast! It is not worth the effort, when my polish is growing out after about 4 days!
As another very physical lady (I work with horses) who loves her nails and make-up, I would recommend at least two coats of polish to make sure it lasts.
Polish Perfect says
If you aren’t certain about LED or UV lights you should wear a protective gloves while using the lamp. It’s better to be safe than sorry. But I think that gel nails are much safer than acrylics (no matter which lamp you choose).